Wednesday, October 30, 2013

Mi novio es un zombi - by Alaska y Dinarama

In the spirit of sharing, my dear friend Nelly Hughes (follow her on Twitter @nellyanhug), sent me a song activity she made for "Mi novio es un zombi" by Alaska y Dinarama. Click THIS LINK to download it, or download it directly from the embedded image below:


To find a video of the song, Google the title and there are several from which to choose.

The lyrics and activity are similar to one made by Martina Bex for the song "La Llamada" by Selena found HERE. If you're searching for additional songs to use in class with ready to go activity sheets, go to Martina's blog and in the search box type "songs".  There are loads to choose from - 32 according to the list on the left side of the blog. This is a perfect example to "work smarter, not harder".

There is no excuse for not including songs in your teaching. ("Physician, heal thyself" - I admit, I should add more songs on my lesson plans.)

Tuesday, October 29, 2013

On Time - Short Films with Spanish 4

I am thoroughly enjoying my Spanish 4 class this semester.  First, it is a small class - 15 students, which is small compared to my other classes. It's much easier than my other classes to get several interactions from each student throughout the class period.

Secondly, the majority of the students are willing to participate in discussions in Spanish, on just about any topic.  They know the expectation is to speak in Spanish and, for the most part, they do that. (see the end of the post for reason #3)

Below is how I used the short film, "On Time" by Ted Chung to draw them into a conversation in Spanish.

1.  Discussion: We talked about being able to see the future ...
- Are there advantages and disadvantages?
- What are the advantages? Not surprising, one of them said the ability to know the answers on a test is an advantage because you can the questions before you take the test. 
- What are the disadvantages?
- What would happen if 1/4 of the students at our high school could see into the future?
- How would the 3/4 that don't have the ability to see the future feel about the 1/4 that can?
More possibilities:
- Would someone that can see the future work to prevent negative things happening in his own life?  Would that consume him?
- Are there times that you wished you could have prevented something from happening but later find out it was a good thing? 
- Is there something you can share that happened that if you had known how it was going to turn out, you would change it?

...and the possibility of questions goes on and on.

2.  We watched the video, On Time by Ted Chung without sound. With no sound as interference, I was able to narrate in Spanish about what was happening, especially about the conversation the two men had.


On Time from Ted Chung on Vimeo.


3.  Then I handed them a collage of screenshots from the short film in order as the events happened.  Most (maybe even all) of the students helped to describe and retell the story. 

As is customary for me as we discuss and retell the story, I write words on the board that some of the students may not know or need to see it written to help them recall what it means.  

4. After we retold the events together as a class, I put students in groups of 3 for additional practice.

5.  In conclusion, I asked the students to list the words from the story that they feel are most useful to them.  For example: lupa (magnifying glass) was a new word for them, but they didn't choose that for the list because it isn't a word they use often in English.  They put 9 words on the list.  I'll use those words as much as possible in future discussions and in narrating the films, and eventually include them in a quiz.

Other than the photo collages, I didn't make any fancy papers to review.  They are doing a nice job reading, rereading, and using the new words in discussions that I don't think extra paperwork is necessary. 

-------

For the third reason why I am enjoying the class...
They're great students, which explains why they are so patient with me.  I have a tendency to get distracted, easily.  But, lucky for them, it means we chat about everyday things that you would normally chat about in English, and since it is interesting to them, (at least it appears it is interesting to them), it keeps their attention, and, they are being exposed and introduced to many, many words that arise naturally in conversation.   

Monday, October 28, 2013

Small Group game to review vocabulary in context

I tried a new game in class today because I wanted students to review the words that we had in a story last week.  The way I set up the game, the students were in charge and I circulated throughout the room to oversee the activity and answer questions when needed.

1. Divide the class into two large groups - Group A and Group B.  I took the alphabetical list of their names and the first 1/2 of the alphabet was Group A and the second half was Group B.

2.  Group A and Group B sit together and read the class story that is written in the Target Language but the students read it in English. You can use any reading that you want to review that you have already read before in class, such as a class story, a chapter in a book, a short reading on culture, etc.   

I have big classes so I had Group A and Group B split into two or three smaller groups to read.  

3. Tell the students in the two Groups to find a partner in their group.  Then pair two students from Group A with two students from Group B.  Continue doing this until all students are in a group of four consisting of 2 Group A members and 2 Group B members.

4.  Tell the students to sit in a square with the A's across from each other and the B's across from each other.  (see diagram on the right) 

5.  Group A chooses a word from the reading (in the TL language since the reading is in the TL), says the word, and points to it in the story/chapter/text.  The two Group B members then write the word in English on a piece of paper.  They cannot consult with each other.  Group A must make sure that the two Group B students do not cheat and look at each others paper.  (That is why they are seated across from each other in the square.)  

To insure that the student from Group A that selected the word for Group B to translate, one of the Group A students must also write the word in English.

6.  When Group B students have written their words, they show it to Group A.  If both have the answer correct they earn two points.  If one student has the answer correct, they earn 1 point.  If neither of the students wrote the correct word, they do not receive any points.

7.  Group B then chooses a word for Group A to translate.  

8.  Each group keeps their score.  After 10 minutes, I chose 1 student from each group of 4 to write the scores for A & B in their group on the board.  Tally the scores and find which group is the winner.

This worked well that the students kept their own scores.  All the students were actively engaged because the groups were small, and they all knew that their scores were going to be added in to the grand total.

Sunday, October 27, 2013

Additional Day of the Dead Activities and Projects

Painted pumpkin in Día de los Muertos style
Each year there are more great activities for Day of the Dead mentioned on Twitter, or Pinterest, or on the language forums.  Last year I wrote a post with more than 23 ideas for Día de los Muertos, and if I had known about these, they would certainly had made the list.

1. The first idea I found on Pinterest, which lead me to this website.  As soon as I saw it I knew it was going to be my project for the weekend. I completed my pumpkin today (on the left) and I'll take it to school with me tomorrow to adorn my room for the week.  This would be a great last minute Spanish club idea.  It will work best if the students either buy a white pumpkin so they don't need to paint it first, or bring a painted white pumpkin to the meeting.

2.  The blog "Aprendemos Español" has a post on the animated short film "La niña que recuerda".  She included a link to the video, a slide show with screen shots, sentences to match to photos in a collage, and links to several other resources for Día de los Muertos.  Thanks to Elena López for sharing her work! 
(Also check out her blog for other resources.)

Building a Strong Foundation

What do you do when through questions and conversations, you realize your students  haven't mastered something from the previous level that is key for a solid foundation and continued growth?  That happened to me last week with my Spanish 2 students. After looking at their confused expressions, I decided to stop, take inventory of what they had and hadn't mastered, and then address the problem straight on.


Solid foundation - mastery of essentials
First, to get a clear picture on exactly what the students were struggling, I gave them a non-graded, short assessment.  Through that assessment, I discovered they were weak on the nosotros form of the verb TENER, and they were frequently forgetting that, with verbs, the plural form of you, Ustedes, was the same verb form as ellos & ellas.  TENER is one of the top 7 high frequency verbs, according to people that study word frequency in languages.


After taking a poll of the results of the non-graded assessment, I drew a sketch similar to the one on the left.  I explained the importance of a solid foundation of a building, and that it was an integral part of the subsequent floors of the building.  Then I equated the building's foundation to that of the language foundation they had worked on building in Spanish 1.   

Then I erased parts of the pillars of the foundation (similar to the sketch on the right, erasing a good deal of the foundation pillars to make a point).  It was evident to everyone that a weak foundation, or maybe only one or two blocks missing in the foundation, can cause difficulties when working on higher levels.  Instead of pushing upward in the construction, it was best to go back to the foundation to reinforce and repair any weak areas. If they didn't acquire the nosotros form of TENER in Spanish 1, then it was my job to provide them with additional exposure to it, in a comprehensible way of course, in order to allow acquisition to take place. 

In the past, I would have typed up a worksheet using TENEMOS, but I didn't want the focus to be specifically on the grammar.  Instead, I wanted the focus to be on communication that required us to use the word TENEMOS.

The following day, I started class by telling the students in Spanish that we have some very talented students in our class.  In fact, we have talented AND intelligent students in our class (which gave me the opportunity to write personas talentosas e inteligentes), and added that we have talented, intelligent, AND famous people in our class.

I gave 3 examples of the talented people that we have in our class.
1. Tenemos una estudiante en nuestra clase que puede hablar con fluidez 7 idiomas.  The class played along, called out the name of one their classmates, I questioned them and waited for their admittance that it was true, and then we listed on the board the 7 languages that the person speaks.
2. Tenemos tres estudiantes en nuestra clase que vuelan a la escuela. (...that fly to school).
3. Tenemos dos personas en nuestra clase que pueden correr una milla en menos de tres minutos. (..that can run a mile in less than 3 minutes)

After those examples, each class had to tell me about the other famous, or talented, or intelligent students that we have in our class.  I made this a competition between my three Spanish 2 classes.  By the end of the day I had 3 separate lists on butcher paper of the incredible students we have in each class. Would you believe we have students that can walk on water, one that is a one man football team that can beat the Patriots, one that can jump 300 meters, one that turns into Hannah Montanta on the weekends, one that swims in lava, and one that beat Usain Bolt in a race!

It was a lot of repetitions of TENEMOS but it kept their interest because of the content, not the grammar.  On Monday, I'll review Friday's activities by asking each class if "we have a student in class that...." and go down through the lists of things from each class.  They'll hear it, they'll read it, and they'll write it on Monday.  That will be one pillar well on the way to being repaired.  A little bit of cement from time to time, should eliminate that problem and then we'll address other weak spots as they become evident.

Reminder for myself - DON'T try to mask over any problems or weaknesses that students have from previous levels and DON'T put the blame on the students.  I readily accept the fact that last year the three Spanish 1 teachers (one of which was me), should have included the nosotros forms more than what we did.  We're addressing it with our level ones this year in an effort to build a firm foundation for subsequent years.


Wednesday, October 23, 2013

Embedded Recordings to go with Embedded Readings

Mary Glasgow site: http://es.maryglasgowplus.com/students/features
One thing I know my students need more exposure to is listening to the TL from someone other than me.  Today I tried an activity using the Mary Glasgow website that worked well and required little preparation. (Now that's a beautiful combination!)

 1. Go to the Mary Glasgow site found HERE or use the links below to go directly to the news recordings and readings:
Spanish - link to Noticias,
 French - link to Actualités,
 English - link to News

2. Choose a recording that relates to the topic you are working on in class, or simply choose a topic that looks interesting to you and your students (and there are many to choose from, including the older files kept in the archives). Below are some of the current resources for Spanish available on Mary Glasgow's site.

3. Put the students into groups of 4 or 5 (depending on your class size. For my class of 15, I had three groups of 5 students each)

4. Play the lowest level recording WITHOUT letting the students read the transcript. 

5.  After they have listened to the lowest level recording one time (or more than one time if that works better for your students), ask each group to say one fact or piece of information from the recording in the TL. After each team has had the opportunity to share their fact/information piece, start a second round of sharing information. 

6. After they have shared all the information they remember, play the 2nd version of the recording, which will have additional information embedded in the recording along with the original information.  Once again, ask each group to name more information. They can name the new information or now that they've heard some of the information the second time, they may now be able to give more information from the first recording that was repeated in the second.

7. Continue through the 3rd level or through the number of levels provided.  The team with the most points is the winner.

After you've listened to the highest level, you have the option to go back and read one, two, or all three levels.  

To make it easier to record what each group said, I copied the transcript and printed it on paper.  As each group gave a piece of information, I highlighted what they said on the paper and put their group number next to it.  

Depending on the intensity of your classes, I suggest this activity for level 3 or higher.
Also, consider ordering the magazines published by Mary Glasgow.  This is the first year I ordered some for my classes and they are filled with interesting articles and photos that are designed to be used by several different levels.

Imperfect Tense - Photos Provide Wonderful Compelling Input

Are you looking for an easy way to get a lot of repetitions of high frequency verbs in the imperfect tense? 

Tell your students to bring a photo to class or to email a photo of themselves doing something when they were little.  Put the photos in a powerpoint or share the photos using a document camera. Start by asking ¿Cómo se llama él/ella? (What is his/her name?) and then ¿Qué hacía él/ella cuando era niño/a? (What did s/he did when s/he was a little boy/girl?) After the students answer, talk directly to the student who is in the photo to get exposure to the tú form. For the example of the little girl at the beach, ask:
- To what beach did you used to go?
- With whom did you used to go to the beach?
- For how many days did you used to stay at the beach?
- What things did you do at the beach?
and then mix it up and ask if she still goes to the beach or if she only did that when she was little.
You can easily find a handful of questions for each photo. You don't need to be concerned that the students will tire of the repetition. My students are so interested in seeing photos of their friends when they were younger that they appear not to notice the repetition or, if they do, they don't mind it. 

I use this activity each year with my Spanish 2 students. The photos provide the opportunity for highly personalized questions, complete with actively engaged students and, most definitely COMPELLING and comprehensible input. 

Note: If you have a student that doesn't have photos available of when they were younger, make sure you have a plan B for those students so they don't feel left out.  A nice twist that may be an option for Plan B, is for some students to bring in photos of their grandparents or great-grandparents.  Then you can talk about what the older generations used to do which may evolve into an interesting talk about the differences of growing up now compared to growing up several decades ago.

Thursday, October 17, 2013

Reading Comprehension - How do you know students understand?

If it is true that reading is one of the best ways to acquire a new language, then we should be reading with our students and encouraging them to read as much as possible.  The challenge is to know whether the students understand what they are reading.

House layout, characters, and objects in chapter.
One way to check students' comprehension while reading without stopping to ask comprehension questions or to fill in a graphic organizer (although I use both of these methods often), is for the students to be active participants throughout the reading. 

One way for students to demonstrate that the understand is to have the students move the characters on a "scene" that is scaled down in size.  In the book I'm piloting with my students, there is a chapter with a lot of action taking place outside or inside a house in which one of two groups of people do the following:  
 - run/walk from one room to another in the house
- arrive in front of the house, get out of a car, run to the front door, etc
- go up/down the steps in the house & across the roof
- through the neighbors house, 
- etc.  

To demonstrate that the students understood where each of the two groups of people were throughout the chapter, they each had small papers representing 4 different people, a car, a bookbag, and a suitcase.  As the people and items were mentioned in the chapter, students moved their pieces on a model of the house that I sketched for them (it was a quick sketch and a stretch for my artistic abilities).  It was an easy way to check their comprehension of the events in the chapter, it gave them a specific purpose for listening, plus it gave them additional listening practice of the chapter. 

Review the following day
The following day I used the same papers for review. I taped people and the other objects on different places on the sketched scene, numbered the diagrams 1-10, and typed a list of 14 actions from that chapter. I showed each numbered picture (example to the right) and the students read the sentences in order to match the depicted action with the sentence.  

If you're reading a book that has a chapter in which there is a lot of movement that can be demonstrated easily with miniature characters and objects, this is an option with which you may want to experiment.  It worked well for my students and they enjoyed the novelty of the activity. 

Variations of other activities for your students to be active participants such as Freeze Frame (check back soon for a new example of Freeze Frame and a collage with the photos for additional activities) and using TPR with Reading, as described in this post; scroll to ch4, or read how Martina Bex does this as described on her blog post "Sound Effects Read-aloud".


Wednesday, October 16, 2013

Keynote Speech by Lori Langer de Ramirez, Ed.D.

Thanks to a participant on the FLTeach forum for posting the link to the Keynote Speech by Lori Langer de Ramirez, Ed.D. at NYSAFLT's conference in October, 2013.  I listened to her speech at the end of the school day yesterday while I was correcting papers, and then again last night when I could listen more intently while following along with her powerpoint that she made available to download.

Lori is a captivating speaker with some sensible ideas for using "play" in the classroom.  Lori moves seamlessly from one idea to another so the 40+ minute presentation will go by quickly.  If you invest the time to listen to her presentation, you'll come away with new ideas on how to use "play" in the classroom with growing in the TL as the end goal.

HERE is the NYSALFT's website where you'll find her presentation, as well as her powepoint that can be downloaded.

She mentions her Pinterest board in her presentation.  You can find her boards and 2,800+ pins at Pinterest HERE.

Enjoy!

Tuesday, October 15, 2013

Ticket out the Door + Monday morning review

If you are reading a novel with your students and want a short review on a Monday morning after students haven't seen the text for 2 days, or any morning for that matter, here is a quick review that your students can make for you.

Student sketches for review and ticket out the door
During the last 3-5 minutes of class, (they won't need more time so don't waste time by extending it), give the students a piece of 8 1/2 x 11" copy paper. They should fold it hamburger style and tear it into two pieces.  Then tell them to sketch two things that happened in the chapter that are important to know.  Before they leave, they hand their two sketches to you and, if you need a ticket-out-the-door idea, they can say one sentence about one of the sketches they drew. ba-da-ba-da-BING! A review and a ticket-out-the-door, all rolled up in one!

Trust me, even if it is a short chapter, there will still be many different sketches because each one has their own idea of what was important in that chapter.  Also, some students that aren't artistic may choose something easy to draw instead of the important events of the chapter. No problem. A large variety of sketches is good.

On Monday morning, put the sketches under the document camera for all the students to see (or fax them to your computer and project the file onto the board), and ask the students to come up with sentences that describe the sketches.  The sketches will keep their attention because they love looking at their own sketches or those of their friends. 

There are other activities you could do with the sketches, but this one requires very little of your time and it is a good way to remind the students of the events in the previous chapter before continuing with the next chapter.

Se Puso - Pre-teaching Vocabulary

Two weeks ago I was preparing a lesson and follow-up activities for chapter 2 of the novel that my class is piloting when I realized my students did not know "se puso" and it was an important element of the chapter.  The biggest problem was not that my students did not know the word, it was that I had little to no voice due to a nasty cold (one of the things I brought home from Alaska).  In the past I used the book "Froggy se viste" to introduce se puso and se quitó but it was too late to go to the public library.

Instead, I made a powerpoint with questions using se puso on 15 slides.  It turned out to be a short review of clothing also.  I still ended up reading the questions to the students with my crackly voice, but I was confident that the students felt comfortable with the word se puso and would easily recognize it when reading chapter 2 after the activity. (I reinforced the word with the students later in the week with "Froggy se viste".)

The powerpoint can be found HERE

Or, preview it below:


Saturday, October 5, 2013

14+ Uses for the Feltboard App in the Language Class

Earlier today I wrote this post about the New and Improved Feltboard App.  Since I rediscovered the app this morning, ideas continue to pop into my mind in how I can use the app in a comprehensible way with my beginning levels of Spanish and additional ways to use it with students with higher abilities.

I have 14+ ideas listed below, but I'm sure there are many other ideas, and I'll add them as I think about them or as others share how they use them.  Really...the small cost of this app is worth it!


1.Students read a description written by the teacher and recreate them on the ipad. My department bought this app for our ipads last year and FINALLY I have beneficial ways to use it this year. Update September 2015: I created three scenes and saved each scene to my camera roll on my ipad. Then I typed a description of each scene. Students worked with a partner to read the description and create it on the ipad using the Feltboard app.  After each picture was created, they had to show the ipad to me. I compared their scene to the photo on my camera roll and I signed their paper if it was correct. Students then returned to their seats and worked on the next scene. The paper can be found HERE.


2. Students listen as the teacher describes a scene and they re-create it on their ipads.

3.  Students receive a printed copy of a feltboard made by the teacher.  They listen as the teacher describes it and they circle anything that DOES NOT match the teacher's description.  (Ex:  La chica llevaba botas rojas.  Students circle the black boots that the girl is wearing.)

PHOTO A
4.  The teacher creates two separate feltboards with many similarities, but several differences too, and makes copies of them.  (see images on the right) Students work with a partner.  One student has photo A and the other photo B. WITHOUT SEEING their partner's paper, they must communicate in the TL to find the differences.

PHOTO B
5. The teacher creates a feltboard packed full of different objects (especially useful if they are words that you have recently introduced) and projects it onto the board.  After a determined amount of time, the teacher turns off the projector and students write a list of the things they remembered seeing.

6. Practice descriptions such as emotions, clothing, hair color, and prepositions of location using the 9-square grid. (Find an full explanation and ready-made image to download HERE.) 

7. The teacher creates a feltboard packed full of different objects (especially useful if they are words that you have recently introduced) and projects it onto the board.  After a determined amount of time, the teacher turns off the projector and students write a list of the things they remember seeing. 

8.  Students use ipads to create several feltboards and email them to the teacher.  The teacher prints them or puts them on a powerpoint.  On a separate paper, the teacher writes a short summary of each feltboard and students match the summaries to the correct feltboards.

9. As a variation for number 8, the teacher will make a collage of 6 or more feltboards created by the students (a great use for a photovisi collage explained HERE).  Project the collage onto the board. Instead of a full summary of each feltboard, the teacher can read, or write, sentences about each, mix the sentences, and the students search for the feltboard that each sentence matches.

10. For upper levels that have a better command of the language, the teacher creates a feltboard scene as a starting point for a story, and students develop the story.
Variations: 
 - The feltboard scene is the MIDDLE of the story.  Students write what happened before the scene and what WILL happen next.
- The feltboard scene is the END of the story and students write what happened to lead up to that point.

11.  The teacher creates a feltboard scene and makes copies for the students.  Then she reads a story that has nothing to do with the scene except that some of the vocabulary in the story is the same as the felt pieces.  Ex:  The feltboard may show a family in the city, but the story is about a woman that always forgets things.  As the students listen to the story, they cross off the items that were mentioned in the story.  Great listening comprehension!  At the end of the story, students can list the items that WERE NOT MENTIONED in the story.

12. Sometimes in my upper levels for a fun activity, we create a story by sitting in a circle and each person adds a sentence to the story.  A variation of this can be done while illustrating it with the feltboard as the students add a sentence. OR...

VARIATION:  What I like better is that the teacher is the one that has the ipad with the feltboard app, and it is hooked up to the projector so students can see it.  The first student says a sentence. The teacher adds an item and the next student must weave that item into the story. This could be quite an interesting variation.  

13.  The teacher creates a several feltboards to depict a short story.  Email the feltboard pictures and put them into a 4 square grid on a powerpoint.  Students guess the order of the story before they hear the story.  They write or say a logical story narration to justify how they ordered the pictures.

VARIATION: Students read the description written by the teacher, match the pictures to the 4 different parts of the story. Then put them in a logical order.

14.  A basic activity: the teacher creates a feltboard with a large number of felt pieces and copies it or projects it onto the board.  Students work with a partner or in teams, taking turns saying a sentence that includes one of the felt pieces.

VARIATION:  Students simply say the name and color of the felt piece and cross them off until all the items have been identified.  (not a very exciting use, but hey, I'm running out of ideas).

15. Assessment with Photo #1 (from #4 above). Project the photo onto the board.  Either the teacher reads a statement about the picture or distribute a paper with sentences about the picture.  Students write if the statement is TRUE or FALSE.  Option: if false, students correct the statement to make it true.

16. Assessment with Photo #1 and Photo #2 (from #4 above). Student write sentences that describe (x) number of differences between the two scenes.

What other ideas do you have to SHARE?

Feltboard App - New & Improved


If you downloaded the Feltboard app in the past and haven't looked at it lately, you are in for a pleasant surprise. I checked it this morning and discovered the creators added several new features and many new felt board pieces and backgrounds. 

How can MFL teachers use this app in the classroom? I made one project that I'll use in the classroom this week and I have several more ideas that I'll work on when I have time.

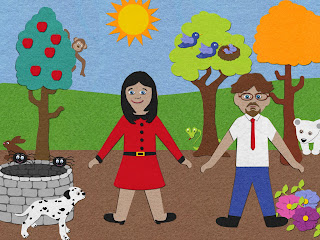
My first project (download above photo HERE) uses the Feltboard pictured on this post to practice descriptions (hair, emotions, clothing), and prepositions of place (a la izquierda, a la derecha, detrás de). First, make a few colored copies of the Feltboard and give one to students working with a partner. Then describe one of the numbered pictures and students listen until they know which one you are describing. (or project the photo with your smart board) For additional practice once they know the correct picture, either the teacher can say True/False statements about that particular picture and students answer Verdadero o Falso, or...students can say statements to describe the picture further.
Note: There are many other colors of hair, clothing, & expressions, but I wanted them to be somewhat similar so students have to listen to several clues to narrow down the correct answer.

Another use for the above Feltboard is to let the students play the guessing game on their own. To support the students as they work with partners, type the descriptions and provide one student with the answers. 

Yet another idea is to ask, or type, questions such as:
- ¿Cuántos gatos negros están detràs de las chicas?
- ¿Dónde está el gato en la foto de la chica rubia que lleva el vestido verde? (a la derecha, a la izquierda, o detràs de ella)
- ¿Cuántas chicas tienen un gato blanco?
- Describe la foto de la chica que está sorprendida.
etc.

The Feltboard app is definitely worth a second look. It has so many possibilities. I look forward to creating more Feltboards with more details on the new backgrounds to use in class - describing, stories, etc!

If you don't have the app and want to download the Feltboard pictured above, try the link in the 3rd paragraph, or try HERE, which is a link to a googledoc.

Friday, October 4, 2013

Post Reading Activity

One of the most important things that I want my students to do when starting a new novel is to become familiar with the characters and understand how they relate to each other.  I started the second novel of the semester with my Spanish 2 students this week.  (I'm one of several teachers piloting the book for the author.) 

The author introduces the three main characters in the first chapter, providing a nice amount of preliminary knowledge about the characters, but leaving the reader curious to learn more.  To help solidify the new information about the characters and the storyline, I had two post-reading activities for chapter 1.

1.I listed the 3 main characters on the board and students searched the text for information on each of them. I listed their answers on the board, saving the character I knew would be most intriguing to the students for last.  The limited information on the 3rd character piqued the students' interest.

2. Then the students wrote the "backstory" of the 3rd characters, an idea suggested by the author.  I read a few of the backstories to the class. Wow! They didn't hold back on their creative ideas.  They wanted me to read all the stories, but I limited it to 4 or so per class.

3.  The 3rd activity was to improve students' listening comprehension while helping to cement the storyline and information on the characters.  I distributed the paper (on the right) and then I read 15 statements and/or questions from chapter 1.  Students only needed to write the number of the statement in the appropriate block, which allowed the activity to flow smoothly.  

We completed the reading and three activities in one class period with time to spare.  The students now have a solid foundation of the storyline and are eager to learn more about the characters in the following chapters.