Last week we started our second semester with brand new students. I have students in my Spanish 2 class that had Spanish 1 in the first semester, some that had Spanish 1 in the previous school year in the fall or the winter semester, and a few that have not had Spanish for two years. Because of the wide variety of time since their Spanish 1 class, I use the first few weeks to review the basics of Spanish 1.
Today I used a version of the Name Game by Martina Bex. I wanted to review the structures:
Voy a... and Quiero + infinitive
I followed the pattern below:
1. Randomly select a student by pulling a card w/ a student name.
2. First person says WHERE he is going and WHAT they want to do.
(Ex: Voy al parque porque quiero correr. I'm going to the park because I want to run.)
3. Pull a 2nd name. The 2nd student repeats what the 1st person said (Ella va al parque porque quiere correr) and adds what that person is going to do (Voy al gimnasio porque quiero jugar al baloncesto.
4. Continue with a few more students.
5. Choose two student names. The 2 students repeat what the previous students have said (they can alternate every other student) and then decide where they are going and why. One student says the first half of the sentence and the 2nd student in the pair says the second half.
Ex: St1 - Vamos al restaurante porque... St2 - queremos comer hamburguesas.
6. Choose another student. That student repeats all previous comments and uses "they" form of verb for the pair of students.
I limited the activity to 20 minutes. The students heard lots of repetitions and were actively engaged in listening because they didn't know if their name was going to be the next one pulled.
A variation of this would be to ask students to sketch their answers and then display them as the students give their answers.
Wednesday, January 28, 2015


Tuesday, January 27, 2015
First Days of School - Additional Materials
Last July I wrote a blog post about activities for the first day (week) of school. One of the suggestions was to do a MovieTalk of a clip of the video of Mafalda's "Primer día de escuela".
I started with a new group of students last week so I made a few additional materials related to the video clip. I already had the transcript of the story from last semester, both in the present tense and the past tense, so I added:
- screenshots to help students with a retell or a timed writing
- before/after activity
- correct one or two words in a sentence to make the sentence correct
- match sentences to screenshots
- order the events
Since there are so many activities, I can select and choose which ones are right for each class.
There are screen shots of the activities below. I uploaded it to Google Drive so I could get a link to share them, but it changed the formatting of the documents. I'll work on fixing the format changes in Google Drive, but until then if you 'd like any of the files, send me a message on Twitter or leave a message in the comments. If you don't want your email published in the comments, mention that and I will not make the comment public.


Monday, January 26, 2015
My First Published Book!

I use this story every semester with my Spanish 2 students because it has a lot of descriptions of what Pablo used to do (imperfect) and it uses vocabulary that my students already know.
Last month I decided to order a printed copy of the book and today...TA DA...it came in the mail! It's such a cute little book. I can't wait to take it to school and find a permanent place to display it and then read it to my new group of students.
I haven't created anything recently on the Storybird site, but when I checked it a few weeks ago, I noticed that it has an growing collection of artwork just waiting for someone to attach a story to it. Maybe that will be a project for my next snow day.
Monday, January 12, 2015
Subjunctive Hearts - in time for Valentine's Day
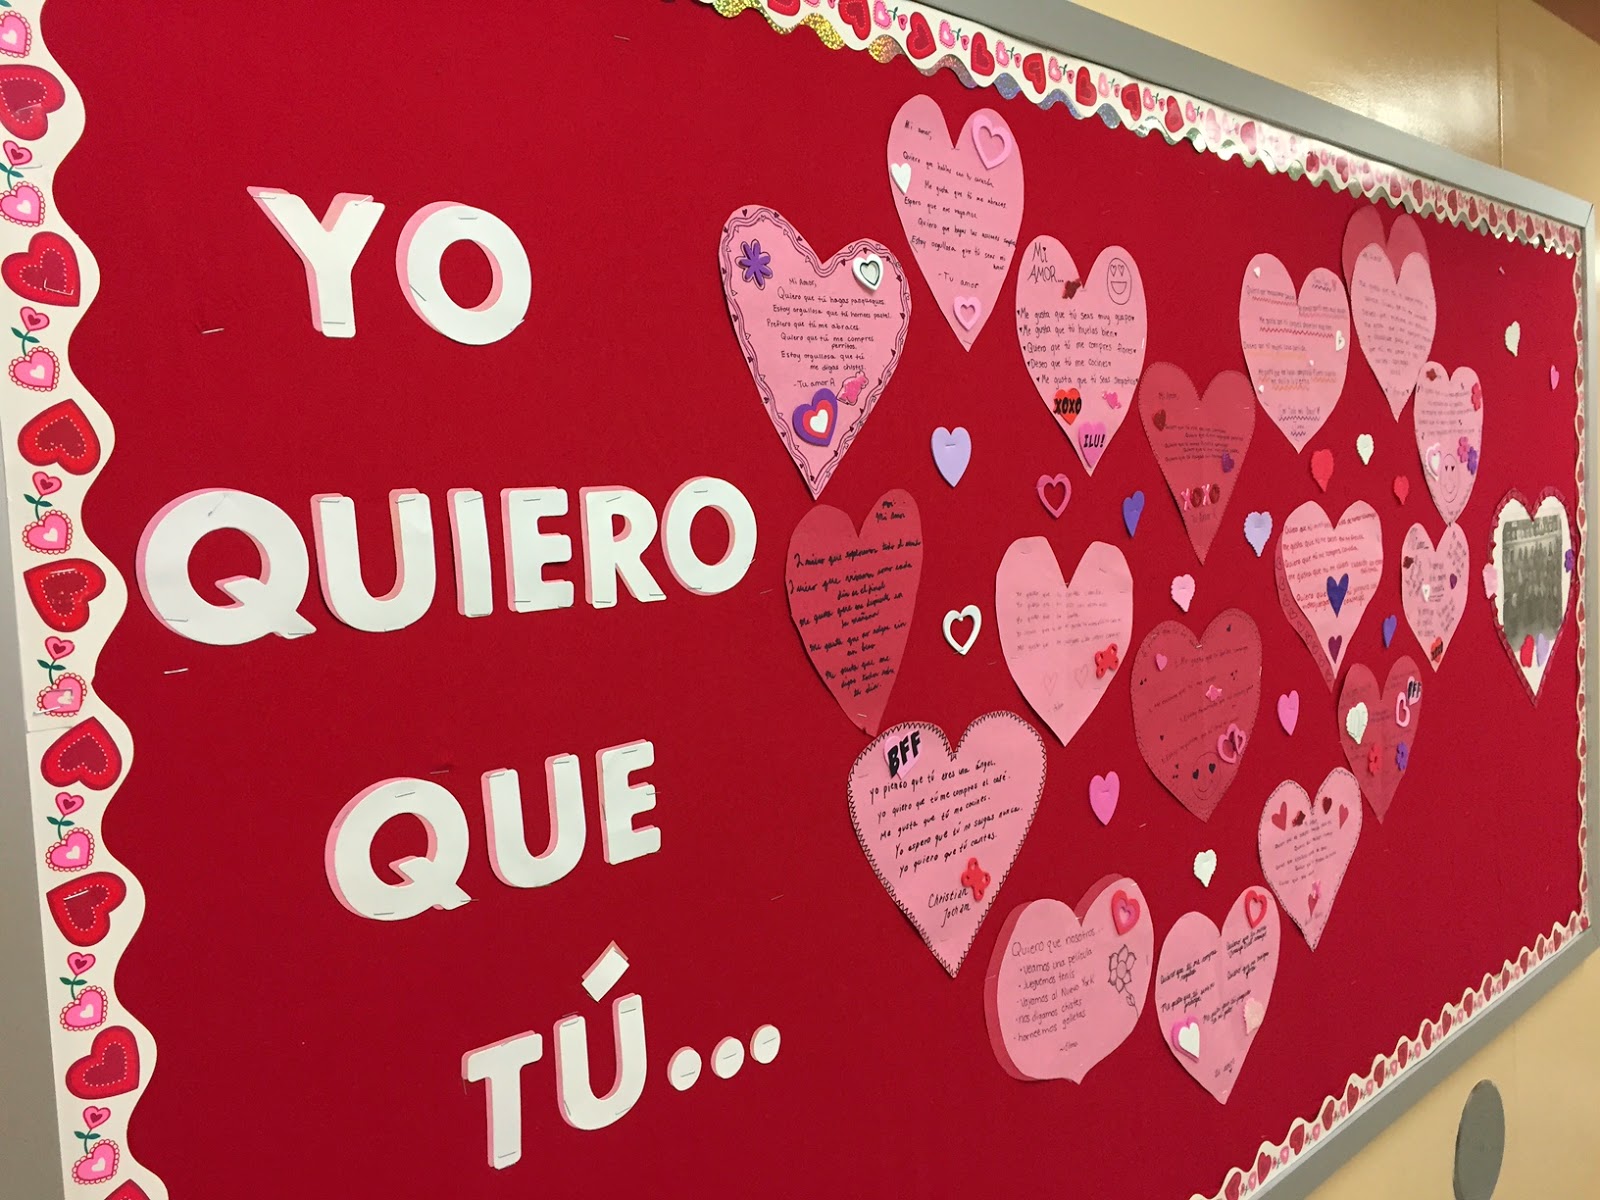
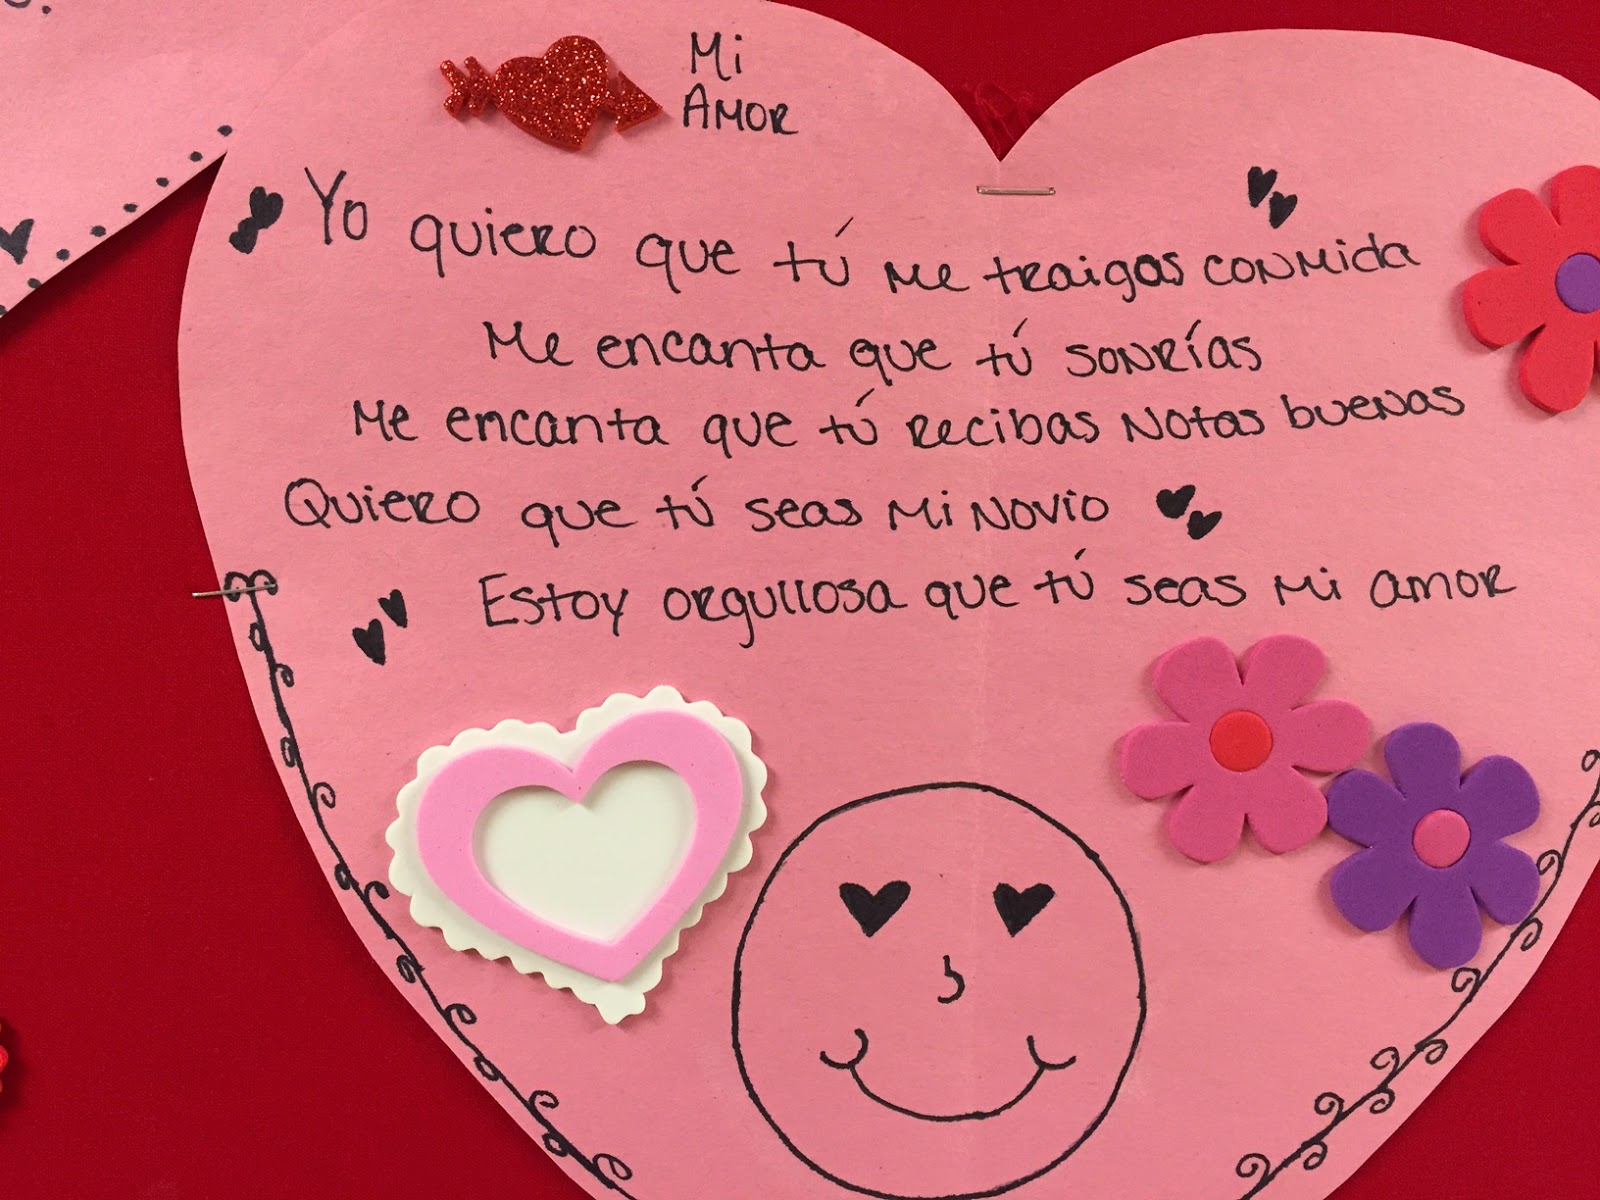 First, my students listened to Victor Muñoz's song, "Mi Princesa". They were familiar with it because I had played it during class changes earlier in the week. After listening to the song one time, I distributed Zachary Jones's cloze activity (found in his Cancionero 2012 book) for them to complete when we listened to the song again. We discussed the lyrics and the multiple examples of the singer wanting someone else to do something - Quiero que tú... (subjunctive indicator) .
 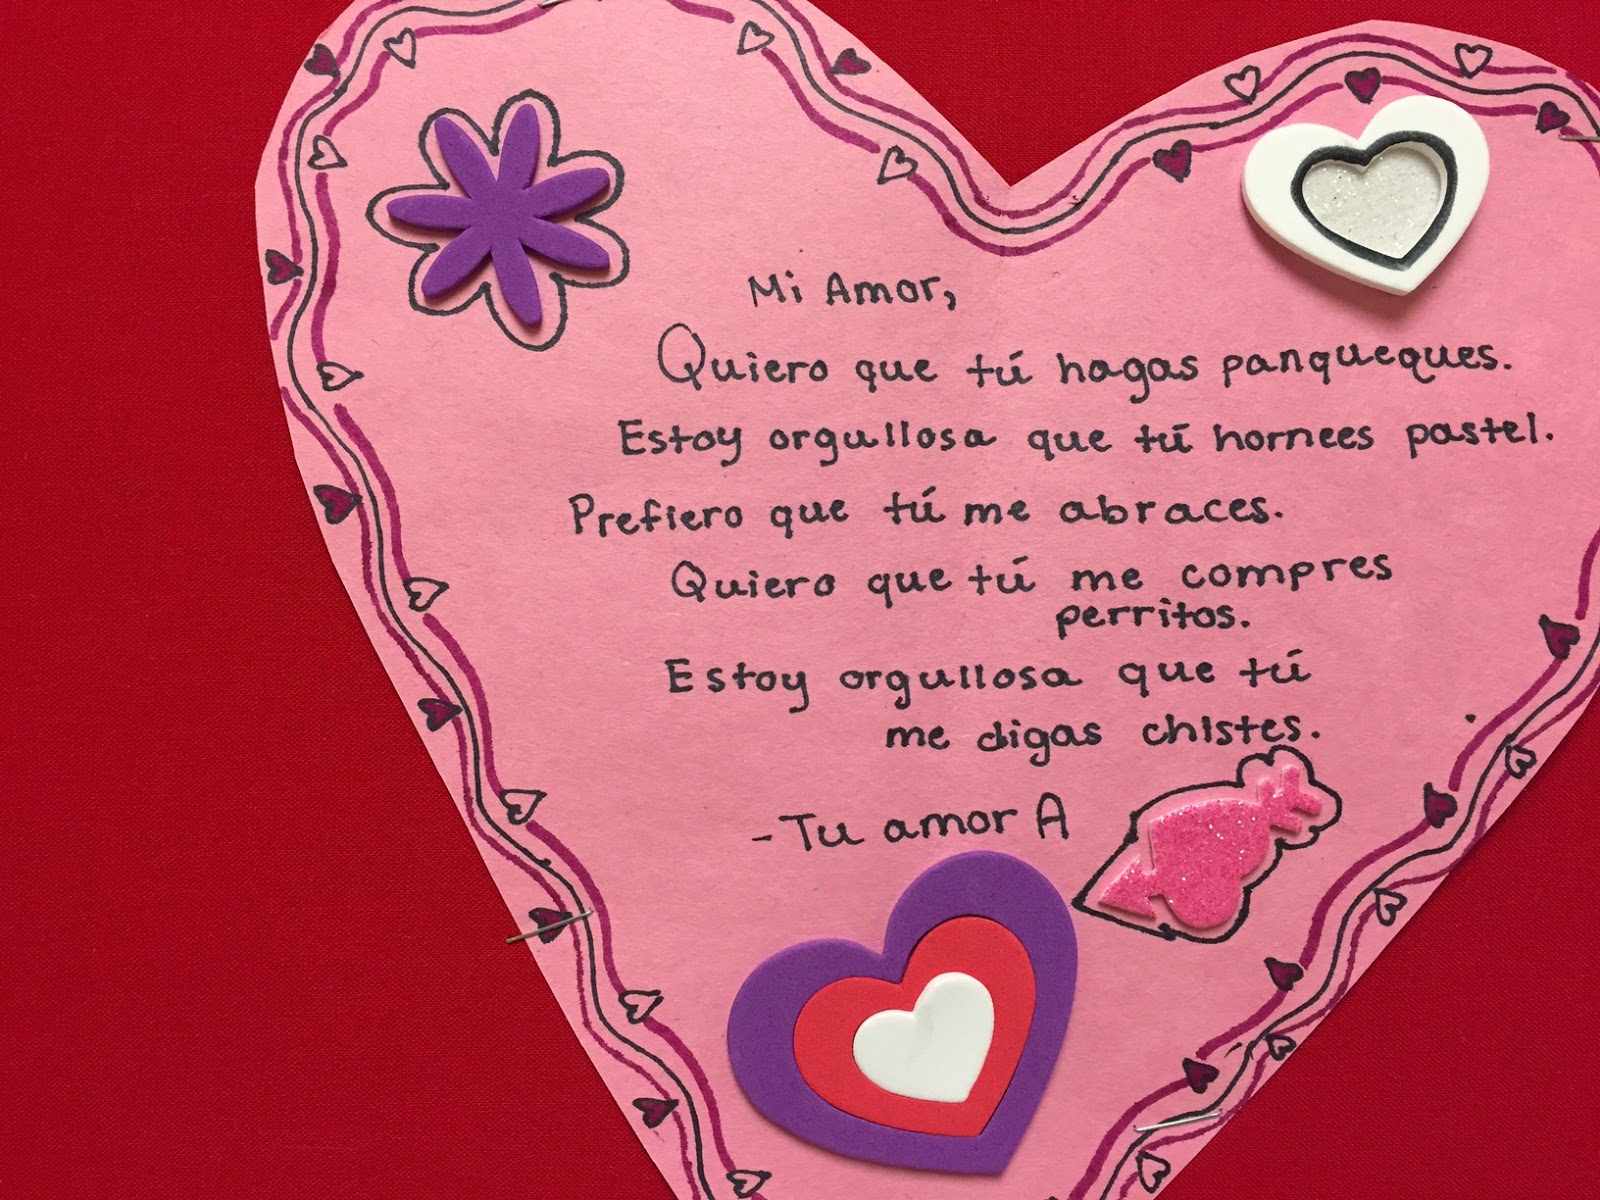 Then the students cut pink and red paper in the shape of hearts, wrote lyrics following the pattern of the song on their hearts, and embellished their hearts with Valentine's shapes.
 As a last minute idea, I decided to post the hearts on the bulletin board outside my room. The students helped me to arrange their lyrics hearts in the shape of one big heart. (My high school doesn't have an Ellison die-cut machine so when I have time to stop at the elementary school, I want to replace the temporary letters with some more polished looking ones.)
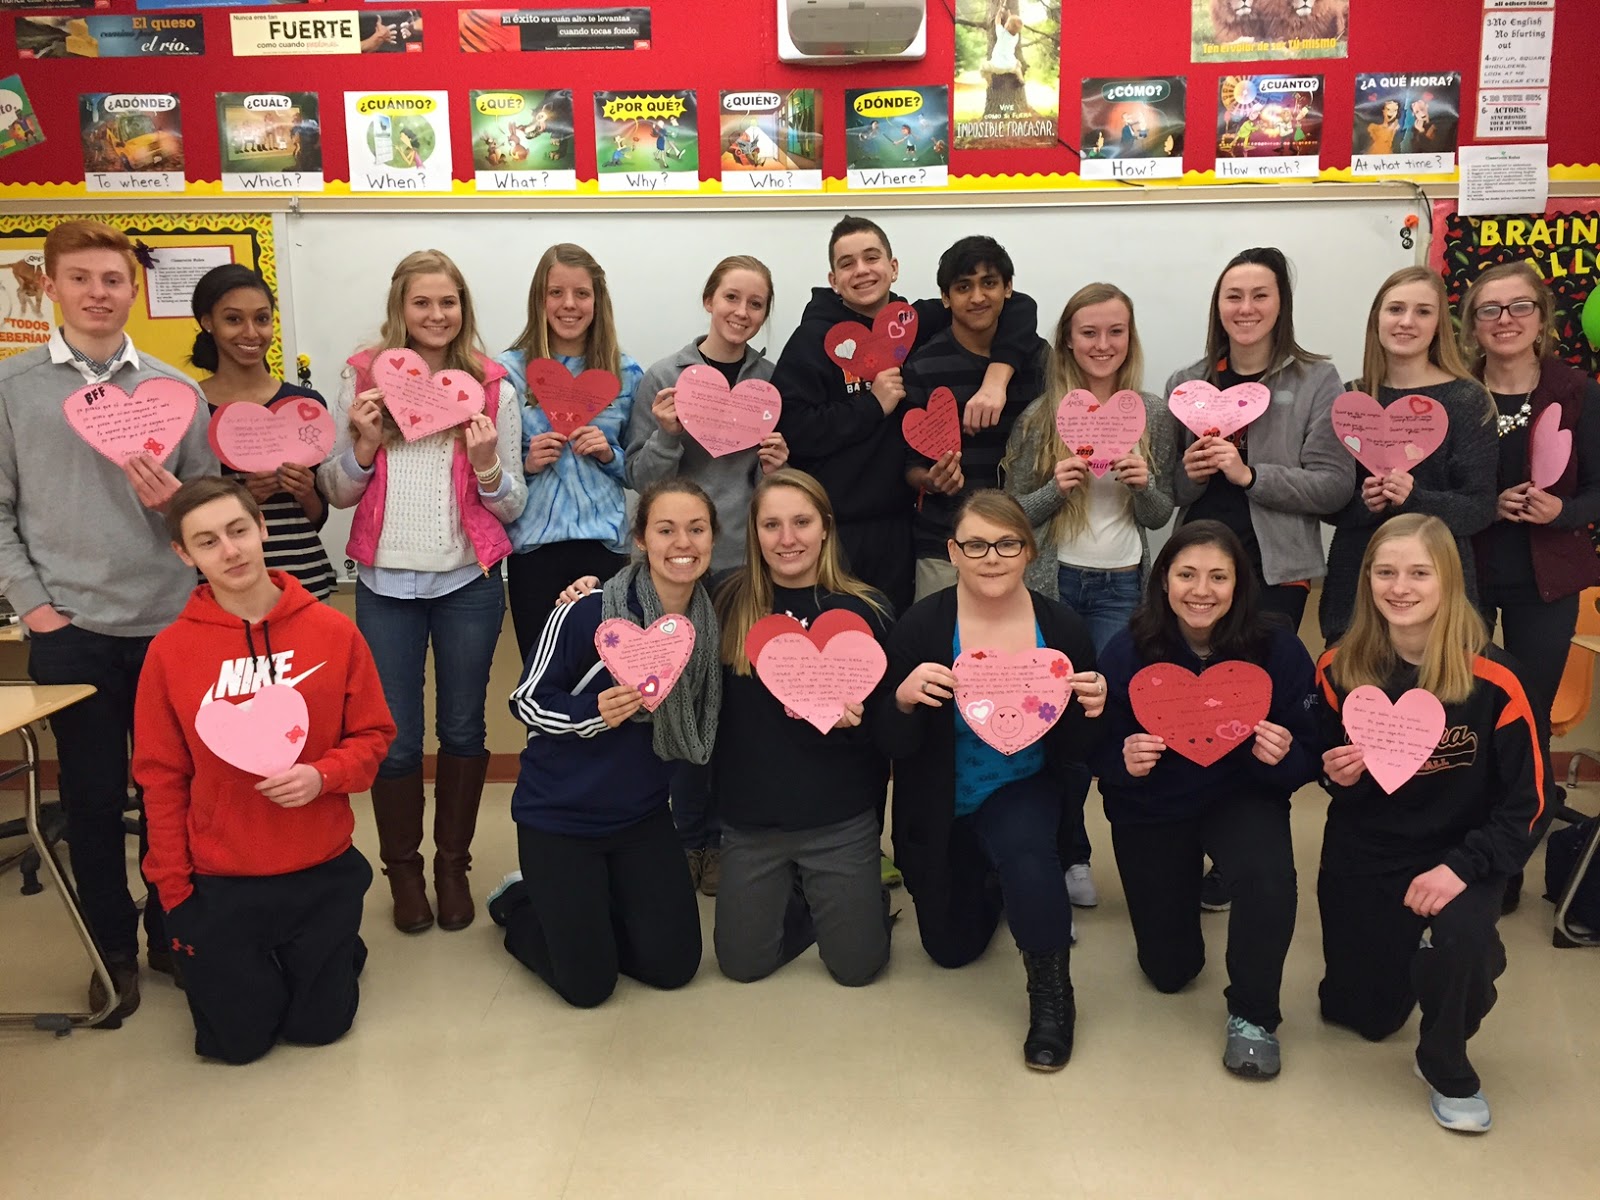 |
| Spanish 4 students with their (Subjunctive) Hearts |
Saturday, January 10, 2015
Reading Spanish Novels Inspires Students to Help Others
 |
| HALF of the cookies |
After reading the books, the class decided they wanted to help others in those countries. Since it was close to Christmas, and since I love to bake, the option of selling cookies to raise funds was an easy decision.
 |
| Adding icing to the oatmeal cookies |
Because there was only one remaining weekend before Christmas and we wanted to distribute the cookies in time for Christmas, only four students were available on Sunday, December 21, to help bake the cookies. But those four students were workers! As soon as they finished one job they asked what else needed to be done. Together we baked oatmeal cookies with cream, raisin-filled cookies, and sugar cookies with icing to add to the chocolate chip cookies I had baked the previous day. The photo at the beginning of the post shows half of the cookies; the chocolate chip cookies are not on the table.
 |
| The 100 step Raisin Filled Cookies (well, not quite) |
Before Christmas break, the students had searched the KIVA website, an international micro-lending organization, and selected loan proposals from people in Guatemala and El Salvador. This week I looked at the loan proposals they had suggested and printed out a list of those that were not fully funded yet. There were 7 options so I gave each student 3 post-it notes. They used the post-it notes to vote for the loan they wanted.
We decided to give $100 to 3 different groups.
A. Tejadoras - Guatemala
B. José - El Salvador
C. Saul - El Salvador
This was a fun, educational experience for the students and for me that reached far beyond the classroom walls! Because of the educational value of this project, it is something I want to continue this with my Spanish 4 classes in the next semester and in years to come!
Many THANKS to Kristy Placido and Carrie Toth who have involved their students in several international projects that offer assistance to those in need and who unknowingly inspired me to do the same! (read about Kristy's KIVA post HERE and 1 of Carrie's projects HERE)
Monday, December 15, 2014
A Super Fun Christmas Game
My daughter was looking for ideas for our extended family Christmas get-together and she found THIS GAME. After reading it, I thought, "I can translate the directions to Spanish and use it with my Spanish classes."
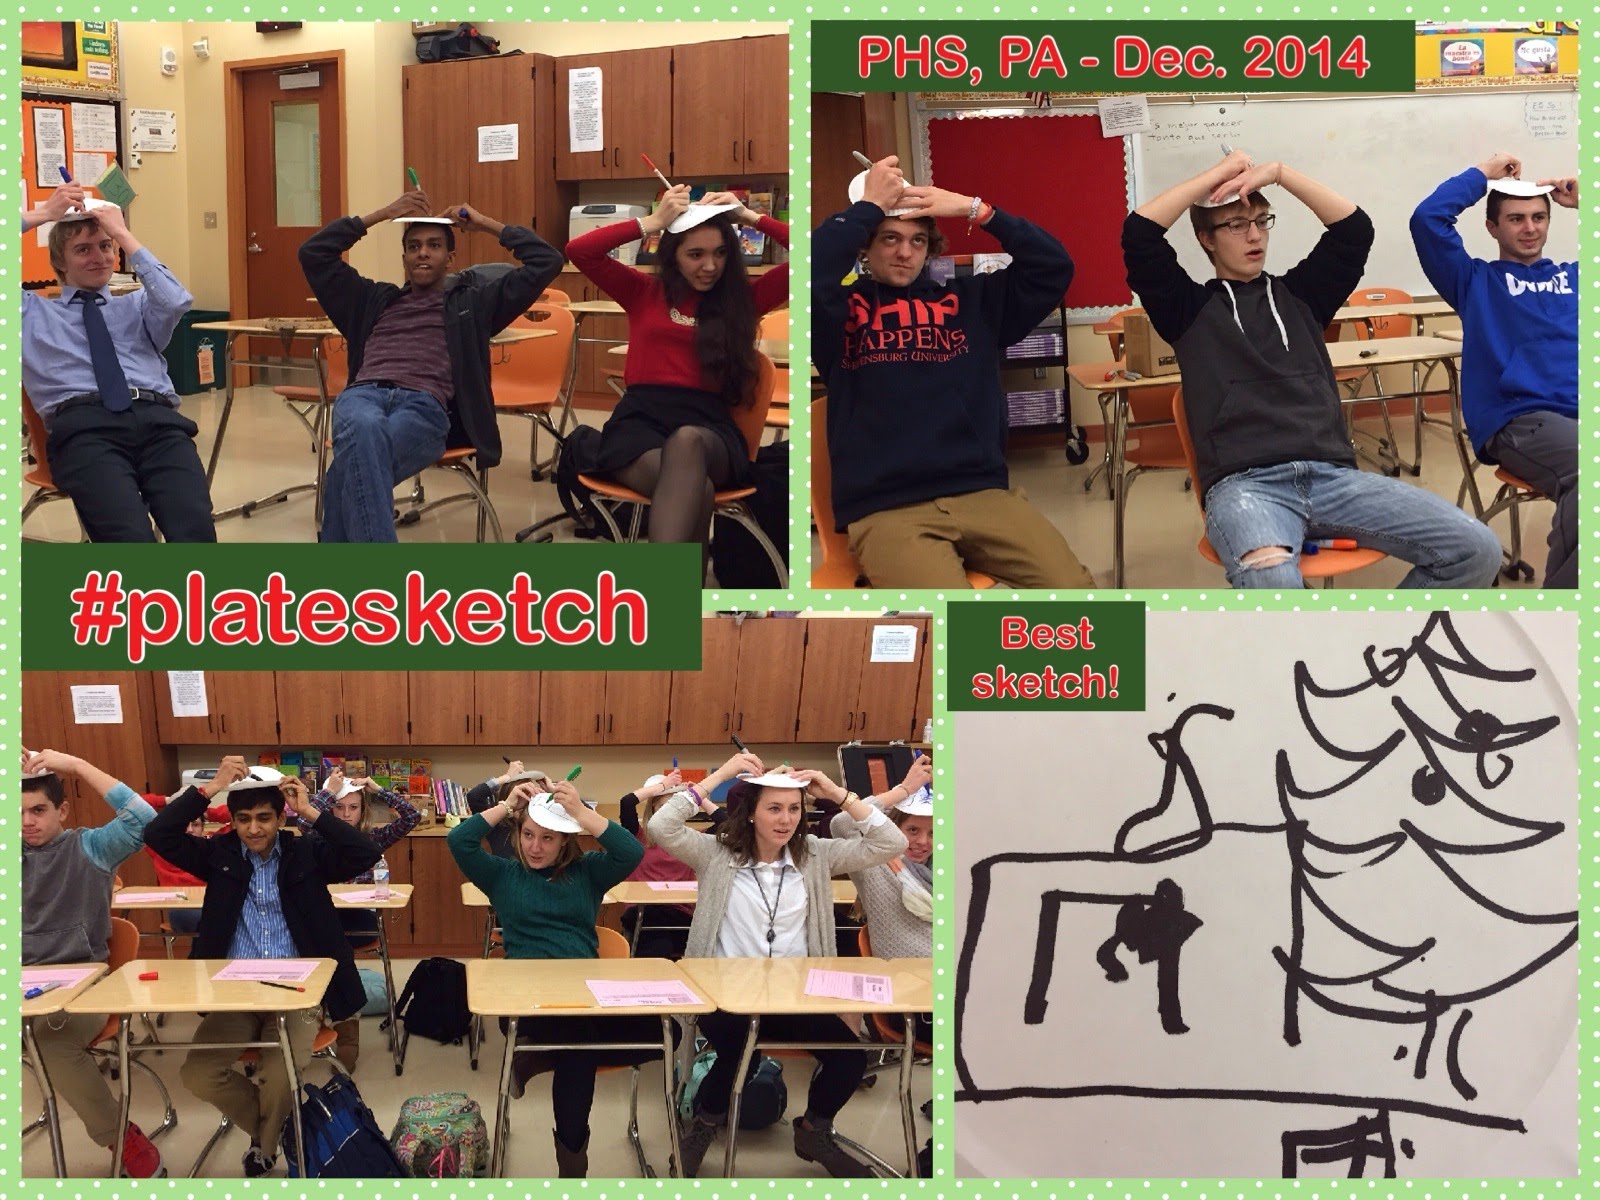
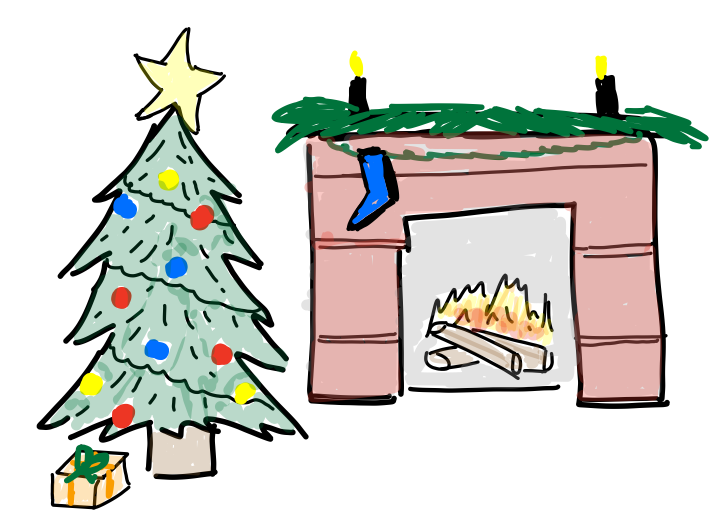 Then I thought, "wouldn't it be fun to ask other MFL teachers if they wanted to complete the activity with 1 (or more) of their classes. If they tweet or email their best sketch to me, I can create a photo collage of the sketches or post photos of their sketches."
I am going to do this activity with all of my Spanish classes this week. I'll probably buy a small prize for the sketch with the most points and/or the best sketch for each class to provide extra motivation for them to concentrate while drawing.
Update: Below are links to two google slides presentations to use with your class:
1. Presentation from 2014 made by Elena Lopez
2. Presentation from 2015 made by Ashley Soriano
Are you interested in joining in?
If so...
1. Complete this activity this week with 1 (or more) of your language classes in your Target Language. Update: @lopezelena saw the tweets about the activity and then created and shared this Google Presentation of the activity - ready to go for Spanish teachers. Thanks Elena.
2. TWEET the best sketch(es) with the hashtag #platesketch or email the sketch(es) to me by Friday afternoon, December 19.
I'll make a collage or use another way to share the sketches on my blog and Twitter.
HERE is the link to the document I shared on Twitter. Let the fun begin!
UPDATED version (as seen below) click HERE
After Christmas I discovered that there were many other #platesketch tweets that I had missed, so I uploaded a second book. Click HERE to view the second book.
I am going to do this activity with all of my Spanish classes this week. I'll probably buy a small prize for the sketch with the most points and/or the best sketch for each class to provide extra motivation for them to concentrate while drawing.
Update: Below are links to two google slides presentations to use with your class:
1. Presentation from 2014 made by Elena Lopez
2. Presentation from 2015 made by Ashley Soriano
Are you interested in joining in?
If so...
1. Complete this activity this week with 1 (or more) of your language classes in your Target Language. Update: @lopezelena saw the tweets about the activity and then created and shared this Google Presentation of the activity - ready to go for Spanish teachers. Thanks Elena.
2. TWEET the best sketch(es) with the hashtag #platesketch or email the sketch(es) to me by Friday afternoon, December 19.
I'll make a collage or use another way to share the sketches on my blog and Twitter.
HERE is the link to the document I shared on Twitter. Let the fun begin!
UPDATED version (as seen below) click HERE
After Christmas I discovered that there were many other #platesketch tweets that I had missed, so I uploaded a second book. Click HERE to view the second book.
Photo Collage from Palmyra High School - Dec. 15, 2014
Wednesday, December 3, 2014
I CAN Statements
One regret of attending ACTFL14 is that I was unable to stay for the Sunday morning sessions. I had an early Sunday morning direct flight, (at an unbeatable price), which meant I had to miss the last 1/2 day of the conference.
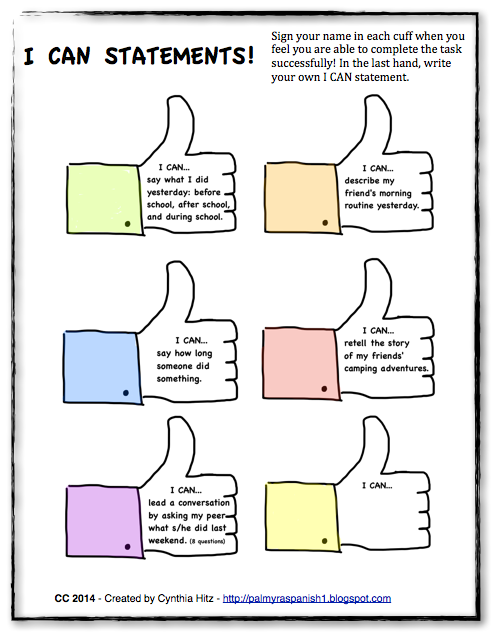 However, there was one Sunday morning session that I was able to hear BEFORE it was presented on Sunday. It was "Helping Students Navigage the Can-Do Statements" by co-presenters Michele Whaley and Mira Canion.
On Saturday afternoon, Michele Whaley, Krista Applegate, and I were debating which session to attend. After several minutes of searching possibilities, we admitted that we were feeling a bit weary from information overload. It was then that Michele asked if we wanted to help her by listening to a practice run through of her Sunday presentation. Of course I said yes! We found a quiet area and Michele proceeded to deliver her "practice" presentation on I CAN statements. Her presentation was informative and helped me to better appreciate the usefulness of I CAN statements.
I returned home from ACTFL pondering how to incorporate I CAN statements in a way that would be beneficial for my students. In the language department at my school, we don't teach what many refer to as well-defined "units". It's easy to visualize how I CAN statements fit into traditional units, but not as clear for a curriculum based on high-frequency words and structures.
It quickly became evident to me that I CAN statements fit hand-in-hand with Backward Planning or Understanding by Design. (Check Carrie Toth's blog "Somewhere to Share", especially this post, for an explanation.) I looked at what I wanted the students to be able to do and then wrote I CAN statements that matched those goals. After the statements were written, it was easy to align the class activities and stories to match the statements. (Michele Whaley wrote a blog post this week with an example of how she is implementing the I CAN statements with her students. Find it HERE!)
On the first day of school after Thanksgiving break, I greeted my students at the door with the above paper of I CAN statements. Each day I remind them to check the paper and sign any statements they can complete. Today as I circulated through the class as the students were working in groups, I noticed a student's paper with her signature in several cuffs. It was evident to me that students are using the statements to monitor their progress. (Note: The I CAN statements pictured above are guiding the students to pull together what we've been working on for the entire semester as they look ahead to the final exam which is less than 20 instructional days away. My future I CAN statements will be more specific to relate to our "units".)
This is only the beginning! I have ideas bouncing around my head in other ways to use the I CAN statements, and when I have time...(hopefully soon), I'll write additional statements for our "units".
On Saturday afternoon, Michele Whaley, Krista Applegate, and I were debating which session to attend. After several minutes of searching possibilities, we admitted that we were feeling a bit weary from information overload. It was then that Michele asked if we wanted to help her by listening to a practice run through of her Sunday presentation. Of course I said yes! We found a quiet area and Michele proceeded to deliver her "practice" presentation on I CAN statements. Her presentation was informative and helped me to better appreciate the usefulness of I CAN statements.
I returned home from ACTFL pondering how to incorporate I CAN statements in a way that would be beneficial for my students. In the language department at my school, we don't teach what many refer to as well-defined "units". It's easy to visualize how I CAN statements fit into traditional units, but not as clear for a curriculum based on high-frequency words and structures.
It quickly became evident to me that I CAN statements fit hand-in-hand with Backward Planning or Understanding by Design. (Check Carrie Toth's blog "Somewhere to Share", especially this post, for an explanation.) I looked at what I wanted the students to be able to do and then wrote I CAN statements that matched those goals. After the statements were written, it was easy to align the class activities and stories to match the statements. (Michele Whaley wrote a blog post this week with an example of how she is implementing the I CAN statements with her students. Find it HERE!)
On the first day of school after Thanksgiving break, I greeted my students at the door with the above paper of I CAN statements. Each day I remind them to check the paper and sign any statements they can complete. Today as I circulated through the class as the students were working in groups, I noticed a student's paper with her signature in several cuffs. It was evident to me that students are using the statements to monitor their progress. (Note: The I CAN statements pictured above are guiding the students to pull together what we've been working on for the entire semester as they look ahead to the final exam which is less than 20 instructional days away. My future I CAN statements will be more specific to relate to our "units".)
This is only the beginning! I have ideas bouncing around my head in other ways to use the I CAN statements, and when I have time...(hopefully soon), I'll write additional statements for our "units".
Monday, November 24, 2014
Storyasking & Nearpod

What is Nearpod? It is an ipad slide sharing app that enables the teacher to control which slide the students are viewing on their ipads. You can create a new presentation or upload a powerpoint presentation you have on file onto the Nearpod site. The teacher views the presentation from her account on Nearpod as the students view the same presentation on ipads or ipods.
Nearpod goes beyond being a simple powerpoint presentation. There are options to embed quizzes, polls, sketches, matching activities, fill in the blanks, add voice, etc. As the students answer and complete the activities, the teacher can view their answers in real time on her computer screen. Also, there is the ability for the teacher to share the students' answers anonymously with the class. By clicking "share", one student's answer will appear on all the ipad screens.
Below is an explanation and example of one of the Nearpod presentations I created and used with my Spanish 2 classes.
My focus structures were: se durmió, se despertó, and estaba cansado. I wrote a story with a plot that provided opportunities to repeat those structures throughout the story. You can write text directly on the Nearpod slides, but it was too limiting to me, so I wrote the text on a powerpoint slide and uploaded it as an image. I looked for places in the text where I could check for students' comprehension, and places where I wanted the students to add their ideas to the story. Then I added slides in the Nearpod presentation with comprehension questions, polls, questions that required the students to sketch, and a fill in the blank activity to summarize.with questions and polls. I drew some sketches to accompany the story and added the sketches to several of the activity pages on Nearpod.
The title of the story is Pedro se durmió. Below is a screenshot of the first part of my presentation as it appears on my Nearpod account.

To start the presentation, each student had an ipad and I gave them the 5 letter code to enter the Nearpod presentation. As they entered, my screen showed the names of the students. It also showed the number of students that entered the presentation in the top right corner. (If at any time a student leaves the Nearpod presentation to explore the internet, the number changes from green to red to alert the teacher that a student has left the session. The teacher can then click on the icon and see which student is not on task.)
After the students were in the session, the picture of Pedro and the title appeared on their screen. Then I moved to the first slide with text and I told them about Pedro. I used the circling technique to familiarize the students with Pedro's information, along with personalized questions about the students' ages, if they ever went to San Antonio, etc.
Then I swiped to the next slide, which moved the presentation to the next slide on each of the students' ipad screens. This slide had 4 short comprehension questions for them to answer. As they submitted their answers, I quickly saw which students needed more circling and repetitions of the information. Below is a screenshot of an example of what the teacher sees as the students answer. (I took this screenshot for this post, not during the actual presentation with the students.)

The next slide had additional text, followed by a slide that asked students why Pedro was so tired. They typed in their answers and I watched the answers appear on my screen. I told the class about 3 of the options the students had written and I wrote the sentences on the board rather than share the students' screens. (This is a Spanish 2 class and since there were small errors in the answers, I didn't want the students seeing the errors.) I then wanted the students to choose which option they wanted to be part of the story so on the following slide they could choose a, b, or c. Their answers appeared on my screen, and the answer with the highest votes became part of our story.
Below is a screenshot of what the teacher sees when the class completes a poll. (This particular poll below, actually is later in the story.)

I continued the storytelling by reading the text with the students, asking comprehension questions while they had the text on their screens, and asking more personalized questions.

Below is the teacher's screen that shows 3 student sketches. The teacher can choose all or only a few of the sketches to share with the class to discuss.

On the very last slide, I created a fill in the blank activity. Since I wanted the students to read, yet one more time, the target structures, I DID NOT choose those words for the students to fill in the blanks. I chose words close to the target structures so the students had to read the target structures in order to figure out which word in the word bank at the bottom of the page was the best choice.
The following day in class, we reviewed the story that the class had helped me to create. Then I distributed a copy of my original story and we read it together. For an additional reading, I had the students form a diagonal line from one corner of the classroom to another. They paired up with another student and their task was to read the story in English. When I told students to change, one student had to move to the right, and the person at the end of the line went to the front of the line. Students continued reading with their new partner. While they were busy doing that, I placed a paper with questions related to the reading on their desks. I sent them to their desks to complete the questions. After all of the readings and work with the text the previous day, the comprehension and short answer questions were a cinch for the students to complete.
I used the Pedro se durmió story with two classes. After we finished, I asked for student feedback. They said they enjoyed helping to create the story with Nearpod.
Advantages of using Nearpod in connection with storyasking/storytelling:
- All students participated
- Instant feedback on which students understood the story and which students needed additional circling and repetition. I didn't have to specifically call on students to find this out since ALL answered the comprehension questions.
- It is easy to return to earlier slides when more repetition is needed.
- Students really wanted to see ALL their classmates' sketches. This meant they heard a LOT of examples of verbs in the 3rd person plural.
- It kept the students actively engaged. There was not much time for them to "zone out".
- Quiet students were engaged.
- I liked the ability to share answers anonymously. If I wanted to share a sentence that was incorrect, I could ask students what they would do differently, but none of the students would know who had written the sentence that was being shared.
Disadvantages to Nearpod
- I STILL...haven't been able to receive help from the Nearpod staff on why I am unable to share the presentation. (frustrating) Update: I found a way to share the interactive presentation that is on my Nearpod account. If you want to view it and have a copy of it, send me your email (in comments below or a direct message through Twitter if you don't want to make your email public) and I will email it to you. You need a basic free account with Nearpod in order to access the presentation.OR...try the following link (you must have a basic nearpod account to open it).
open this link.
- It takes more time to prepare for a story than regular storytelling.
- We are not a 1:1 school, so I need to plan ahead to ensure that I have access to the ipads on a particular day.
- There is a limit to how many presentationsyou can save to the Nearpod account. If you have the free basic level (silver level), only 30 students can log into Nearpod at one time.
- You need an internet connection.
- Technology, overall, diminishes that one-to-one interaction.
Overall, I liked trying something new for storyasking/storytelling. I will
probably use Nearpod for this type of activity 2- 3x/semester (1 semester = 90 days). I don't want to overuse it or the novelty will wear off quickly.
 |
| Another story uploaded to Nearpod |
I have another Nearpod storytelling presentation that I used with another class on "Larry el vampiro". If Nearpod can correct the issue with sharing, I'm willing to share that one through the app email with anyone that is interested.
The above is an example for storyasking/storytelling. Nearpod has MANY other uses which I am interested in seeing and hearing how other MFL teachers have incorporated it into their classes.
Sunday, November 23, 2014
ACTFL 2014 - Breathe Life into Reading Document
Several hours ago, I returned home after a busy 3 days at ACTFL 2014.
For those that attended my session with Krista Applegate entitled, "Breathe Life into Reading to Increase Student Engagement and Comprehension" and others that may be interested, I uploaded a document on the ACTFL website with information from the session.
You can also access it HERE.
If you have trouble accessing it, or have questions regarding the information, please do not hesitate to contact me. You will notice that I added links to my website or others, because with the exception of 2 or 3 of the activities, I have blogged about it in the past or have directed readers to others' blogs with excellent descriptions.
Enjoy.
For those that attended my session with Krista Applegate entitled, "Breathe Life into Reading to Increase Student Engagement and Comprehension" and others that may be interested, I uploaded a document on the ACTFL website with information from the session.
You can also access it HERE.
If you have trouble accessing it, or have questions regarding the information, please do not hesitate to contact me. You will notice that I added links to my website or others, because with the exception of 2 or 3 of the activities, I have blogged about it in the past or have directed readers to others' blogs with excellent descriptions.
Enjoy.
Tuesday, November 11, 2014
El Día de los Muertos - Painting Faces & Pumpkins
To teach about El día de los muertos, my lesson plans were probably similar to many other Spanish teachers throughout the US and in other countries - video clips, cultural readings, songs, etc. (Find more information on these activities in previous posts: Videos & reading materials, and 23+ Activities for Day of the Dead and Halloween.
 But this year I added a perspective to El día de los Muertos that I've wanted to do for the last two years - face painting! I did a trial run and painted half my face two nights in advance and was pleased to discover it took only approximately 30 minutes from start to finish. (see photo on right) Then I convinced our other Spanish teacher to join me, and I spent part of my first period plan with paintbrush in hand and her face as my canvas. :-)
However, the BEST part was when my first class period of student arrived and one of my students also had her face painted for El día de los Muertos.
I used to think this would be hard to do, but IT IS NOT difficult. If you want to surprise your students next year for El día de los muertos, this may be what you need. I have to add that I have supportive administrators who gave me the green light to teach like this for the day!
 Two of my classes did their own version of "face painting" by painting pumpkins to look like calaveras. Since there were a limited supply of white pumpkins where I bought the pumpkins, students needed to paint the pumpkins with two base coats of white before the decorating began. I didn't want to take class time for this so I allowed students to come to my class during lunch and after school. They students came two days in a row during lunch to work on their pumpkins and, even though I really enjoy talking to my colleagues during lunch, it was really enjoyable to have students in my room and chatting as they painted.
I have a great photo of the students with their finished "calaveras" but I didn't obtain permission from each of them (yet) to post it on my blog. If I get that permission, I'll be sure to add it to this post.
Both of these activities would be great ideas for Spanish Club.
 |
| Surprised with my student's face paint! |
 But this year I added a perspective to El día de los Muertos that I've wanted to do for the last two years - face painting! I did a trial run and painted half my face two nights in advance and was pleased to discover it took only approximately 30 minutes from start to finish. (see photo on right) Then I convinced our other Spanish teacher to join me, and I spent part of my first period plan with paintbrush in hand and her face as my canvas. :-)
 However, the BEST part was when my first class period of student arrived and one of my students also had her face painted for El día de los Muertos.
I used to think this would be hard to do, but IT IS NOT difficult. If you want to surprise your students next year for El día de los muertos, this may be what you need. I have to add that I have supportive administrators who gave me the green light to teach like this for the day!
 Two of my classes did their own version of "face painting" by painting pumpkins to look like calaveras. Since there were a limited supply of white pumpkins where I bought the pumpkins, students needed to paint the pumpkins with two base coats of white before the decorating began. I didn't want to take class time for this so I allowed students to come to my class during lunch and after school. They students came two days in a row during lunch to work on their pumpkins and, even though I really enjoy talking to my colleagues during lunch, it was really enjoyable to have students in my room and chatting as they painted.
 I have a great photo of the students with their finished "calaveras" but I didn't obtain permission from each of them (yet) to post it on my blog. If I get that permission, I'll be sure to add it to this post.
Both of these activities would be great ideas for Spanish Club.
Monday, November 10, 2014
Fluency Writes - the Power of Slowing Down Instruction
It has happened - finally. Two weeks ago I collected a class of student Fluency Writes and, across the board, they were much, much better than I had anticipated.
The only difference from other years in which the Fluency Writes were "ok", (but without a doubt much better than students could have ever done when I used to teach directly from the textbook in a very traditional manner), and this year in which the Fluency Writes are consistently better written, is that I forced myself to go SLOWer in my teaching and to not rush into new grammar structures and vocabulary words. When I thought students knew the materials "well enough", instead of moving on, I created yet another story to recycle the words or another activity which included the use of the words in a different manner.
I was a bit concerned when, in mid October, I realized I was at least 3 weeks behind where I was in my lessons from the previous year, but it turns out that the extra time working with the structures resulted in students writing better.
Below are two writing examples:
Example A:

Example B:

These two examples are not necessarily from the top two students in the class. I remember when I took the papers home to read over the weekend, after reading the first 3 or 4 that were really well written, I was expecting the quality to soon go down. After all, surely the majority of the class couldn't write that well. Wrong - the majority of the class really did write "that well".
Background on the Fluency Write:
- I had "storyasked" a story similar to the Larry the vampire story; later told them the story about Larry el vampire; they worked with sketches and matched sentences to them; they put the events in order; retold the story to their partner; and helped create a few other stories that used some of the same vocabulary.
- I then projected a collage of the sketches we had used in class to help remind them of the plot, and students had 10 minutes to write.
- I underlined the correct writing in orange; I used a green marker to underline a sentence that wasn't correct and the following day asked students to work with a partner to decide what would be a better way to write that sentence. I didn't make any (well, maybe a few) marks on the papers after the first 100 words.
- This was their second Fluency Write of the semester; the first one was on a different story.
The only difference from other years in which the Fluency Writes were "ok", (but without a doubt much better than students could have ever done when I used to teach directly from the textbook in a very traditional manner), and this year in which the Fluency Writes are consistently better written, is that I forced myself to go SLOWer in my teaching and to not rush into new grammar structures and vocabulary words. When I thought students knew the materials "well enough", instead of moving on, I created yet another story to recycle the words or another activity which included the use of the words in a different manner.
I was a bit concerned when, in mid October, I realized I was at least 3 weeks behind where I was in my lessons from the previous year, but it turns out that the extra time working with the structures resulted in students writing better.
Below are two writing examples:
Example A:
Example B:
These two examples are not necessarily from the top two students in the class. I remember when I took the papers home to read over the weekend, after reading the first 3 or 4 that were really well written, I was expecting the quality to soon go down. After all, surely the majority of the class couldn't write that well. Wrong - the majority of the class really did write "that well".
Background on the Fluency Write:
- I had "storyasked" a story similar to the Larry the vampire story; later told them the story about Larry el vampire; they worked with sketches and matched sentences to them; they put the events in order; retold the story to their partner; and helped create a few other stories that used some of the same vocabulary.
- I then projected a collage of the sketches we had used in class to help remind them of the plot, and students had 10 minutes to write.
- I underlined the correct writing in orange; I used a green marker to underline a sentence that wasn't correct and the following day asked students to work with a partner to decide what would be a better way to write that sentence. I didn't make any (well, maybe a few) marks on the papers after the first 100 words.
- This was their second Fluency Write of the semester; the first one was on a different story.
Tuesday, October 28, 2014
El día de los muertos - Videos & Reading Materials
Three additional resources for El Día de los Muertos:
1. Last weekend I stumbled upon two videos called "Los Thornberrys y El Día de los Muertos". A few days later, Laurie Clarcq, @lclarcq tweeted "we watched the version today w Spanish subtitles. All looked for stereotypes vs actual practices. Blast from their past."
Here are the links for you & your students to join in the fun too!:
Part 1: youtu.be/TyAuzVG45wg
Part 2: youtu.be/nDv2E6AXMRU
2. Another video related to El Día de los Muertos by Sofia Aviles is on Vimeo: http://vimeo.com/54419314
3. One of the cutest animated short films related to Día de los Muertos is about a little girl that meets her mother when she visits the land of the dead. You can find this video on Vimeo HERE.

After I introduce the short film using the MovieTalk method, I distribute a transcript of the short film and read it with the students. I uploaded a copy of the transcript to GoogleDocs, which you can find HERE.
Another activity I use for additional comprehensible input is a list of statements about the short film. Students need to find the word(s) in each statement that are not part of the story, cross it out, and replace it with the correct word(s).
I also use a 4x5 storyboard that students use to guide them in a story retell. (If you want a copy of the storyboard, email me or leave your email in the comments below or send me a tweet @sonrisadelcampo and I'll send it to you.)
UPDATE!!! I received an email by Susann Shultz in which she shared a slideshow that she made to use with the above video. She gave me permission to share it HERE. THANK YOU Susann!!!
4. For an embedded reading on La Llorona, (a nice choice to follow after El Día de los Muertos) check out Laurie Clarcqs post about Bryce Hedstrom's work on her website Embedded Reading found HERE.
1. Last weekend I stumbled upon two videos called "Los Thornberrys y El Día de los Muertos". A few days later, Laurie Clarcq, @lclarcq tweeted "we watched the version today w Spanish subtitles. All looked for stereotypes vs actual practices. Blast from their past."
Here are the links for you & your students to join in the fun too!:
Part 1: youtu.be/TyAuzVG45wg
Part 2: youtu.be/nDv2E6AXMRU
2. Another video related to El Día de los Muertos by Sofia Aviles is on Vimeo: http://vimeo.com/54419314
3. One of the cutest animated short films related to Día de los Muertos is about a little girl that meets her mother when she visits the land of the dead. You can find this video on Vimeo HERE.
After I introduce the short film using the MovieTalk method, I distribute a transcript of the short film and read it with the students. I uploaded a copy of the transcript to GoogleDocs, which you can find HERE.
Another activity I use for additional comprehensible input is a list of statements about the short film. Students need to find the word(s) in each statement that are not part of the story, cross it out, and replace it with the correct word(s).
I also use a 4x5 storyboard that students use to guide them in a story retell. (If you want a copy of the storyboard, email me or leave your email in the comments below or send me a tweet @sonrisadelcampo and I'll send it to you.)
UPDATE!!! I received an email by Susann Shultz in which she shared a slideshow that she made to use with the above video. She gave me permission to share it HERE. THANK YOU Susann!!!
4. For an embedded reading on La Llorona, (a nice choice to follow after El Día de los Muertos) check out Laurie Clarcqs post about Bryce Hedstrom's work on her website Embedded Reading found HERE.
Subscribe to:
Posts (Atom)